|
Dateline June 2, 2001: CHARLOTTE, NC -- Spring installation revisited... Four years ago, I had a set of Eibach springs installed. Had them on the car for a couple weeks and then had them removed. At the time, the Stealth was my only car, and the guys were unable to get the rear wheels aligned to any better than 1.75 degrees of negative camber - meaning the wheels slanted inward like /---\ . Well, I was already doing 30k miles per year, about one set of tires, and didn't really wanna increase the rate at which I chewed thru tires. So I had them removed. Plus, they only lowered the car 5/8" in the front and 3/4" in the rear - not the purported 1-1.25". They did improve the handling, however, 2 years later when I upgraded to 18" wheels, I realized that just upgrading wheels improved the handling more than the springs did with the 16" wheels - 'course the cost of that upgrade was substantially higher (grin). Anyway, I had kinda been thinking about putting springs back on the car, regardless of the alignment problem, as I have a second car and am not putting QUITE as many miles on the car (still 20k+ per year). I knew I wasn't gonna install Eibachs since I knew I wanted the car lower than those did. I finally saw another R/T non-turbo with the Intrax springs installed (Brad Whelchel's white R/T). I really like the ride height. So I tracked down a set of springs from Nopi (ironically the same place I got the Eibach's previously), and they sat in my garage for a couple months waiting to be installed. Steve Burrows of 3SX finally had a weekend when he'd be around so I went over there and installed them. Did the work myself with a little guidance from Steve, and the use of his spring compressor. They're actually pretty easy to install, and the compressor was only needed for the front struts. I definitely wanted to keep the factory struts as I LOVE having the ECS available. |

Pictures load in another
window, close window to return here
|
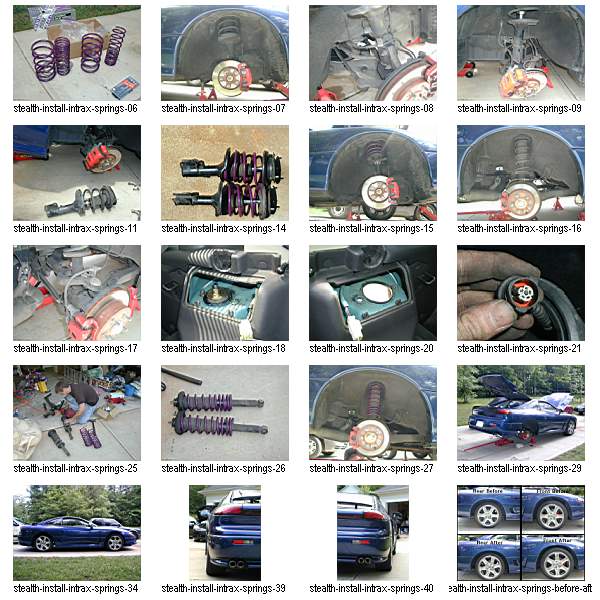
Picture 06: Why they makethe springs purple, I'll never know, but this is what they look like. Oddly enough, they are actually, standing side by side, the same height as the stock springs. Picture 07 - 15: Installation of the front springs. Remove the 3 nuts on top (if ECS - otherwise just loosen the 3 bolts) and remove the black cover and loosely put the nuts back on. Loosen the big center nut in the center (after unplugging ECS obviously). At the bottom, mark the alignment on the top bolt, then remove both bolts - the rotor/caliper gently fall toward you. Remove the top three nuts and fanagle out the strut. Mount strut on spring compressor and clamp down the spring. Then remove the center nut at the top and take the cap-piece off. Loosen compressor, switch springs, and reverse the whole process to reinstall. Picture 16 - 27: Installation of the rear springs. Remove black covers and unplug ECS. Loosen all three top nuts. The bottom is only one bolt accessed from the inner-underside. Remove the bolt and then remove the two side nuts at the top. It takes some major wiggling and working to get them out, but they eventually do come out. Remove the top center nut, replace springs, and reverse process to reinstall. You'll probably need a pry-bar or good size flathead screwdriver to get the bottom of the strut to line up with the hole to get the bolt in. Picture 29: Floating car! Picture 34: First picture with the springs installed. Schweeeeeet. :-) Picture 39 & 40: A couple pictures of the rear wheels to show the negative camber angle. Not really all that bad. Will see if an alignment striaghtens them any. Before & After Chart: Took a "before and after" of each wheel on the passenger side the day I installed them so I'd have pictures to show how much the difference is. I also have before and afte ractual measurements (below) detailing how much the car was actually lowered. Net result? Sweet! I LOVE how they look. Dropped the car nicely, and it literally is STRAPPED to the road! When I go into sport mode, there is literally NO body roll or nose-dive on shifting, etc. It's very tight. And thankfully there is no clunking that I know sometimes comes from installing aftermarket springs. |

Click for a bigger picture - loads in a new window.
|
Pre-
& Post-Installation Height Measurements
|
||||
|
I took specific measurements of the notorious "well
gap," of which these cars have plenty! I measured from the apex
of the wheel (not tire) to the apex of the well. I did measurements
before installation, immediately afterwards, and about a week later
once the springs had a chance to settle in. Here's the results and net
lowering of the car.
|
||||
|
|
Pre-Install
|
Post-Install
|
Drop 6/02
|
Meadured Drop 6/11/01
|
|
Driver Front
|
6"
|
4 5/8"
|
1-3/8"
|
1-1/2"
|
|
Pass Front
|
5-7/8"
|
4-7/8"
|
1"
|
1-1/8"
|
|
Driver Rear
|
5"
|
4"
|
1"
|
1"
|
|
Pass Rear
|
5-1/2"
|
4-1/2"
|
1"
|
1-1/4"
|
