 1 1 |
 2 2 |
 3 3 |
 4 4 |
 5 5 |
 6 6 |
 7 7 |
 8 8 |
 9 9 |
 10 10 |
 11 11 |
 12 12 |
 13 13 |
Well, I finally decided to go after the dash tweeters. I'd been looking all over for an extra set and got a pair when a friend got majorly rammed from the rear by some old man - totalled the car. She was ok, but I took a bunch of pictures of the car, and also nabbed the dash tweeters as my extra set! I didn't wanna butcher mine, cuz if I screwed up, well, I'd be screwed because I would have gaping holes in the dash!
Anyway, I got those in October of 98, and finally one weekend (early March 99), I got started. And finished.
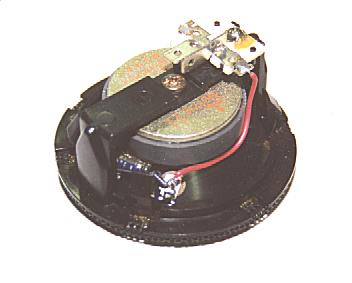
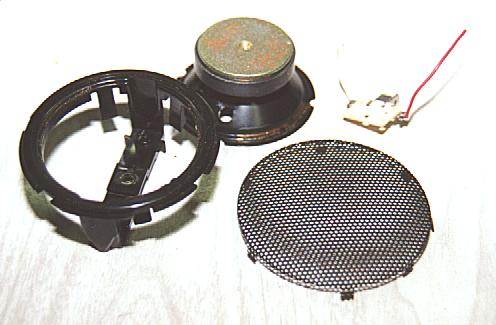
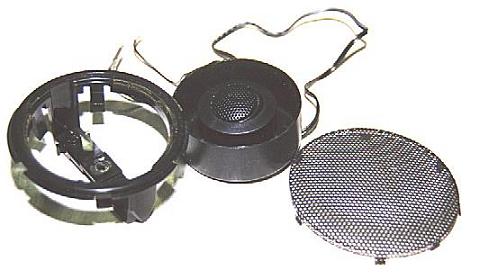
First I took one of the extra tweeter pods (Picture 1) and disassembled it to see what I was up against. My intention was to use the factory grill cover so it'd look normal, and if possible, use the plastic bracket that held the factory tweeter. Picture 2 shows the pod taken apart. It was literally a 2.5" paper cone tweeter mounted in the black plastic bracket with the grille cover clipped on around the edges. The white piece in the upper corner was the wire harness.
I was using a pair of Rockford Punch Tweeters. These were the same ones I had used in my old Paseo, but hadn't used since (3 years). They are little 1" eyeball-type tweets and I can surface or flush mount them. Come with crossovers at 6.5khz.
Ok. So now I've got a perfectly usable bracket to mount my speakers in. Hmmm... How do I manage this. I was thinking one of two things: 1) I would cut a round piece of plywood and recess it in and surface mount the tweeters to that, or 2) cut a round piece of double-think MDF and route out the center and flush mount the tweet. So I dug out a scrap of plywood I had and put it thru the bracket, then tried the surface mount option. Hmmm... No good. Too thick - the tweeter came out too far and the grille wouldn't fit on without being pressed tight against the face of the tweet's grille. That ruled out angling the tweet for imaging.
Ok, option 2 it would be. Now I needed a piece of wood the size to fit in the bracket. I tried tracing, but couldn't get a good circle because the bracket is not totally flat on top, at least not on the inner edge I needed to trace to get the inside circle size. Yeah, I could measure, and compass draw it (what, and be practical?! :-) . So I'm looking around my garage looking for something that's round that might be the right size and I can trace on the wood to get the right size circle. I spy and try a few things...
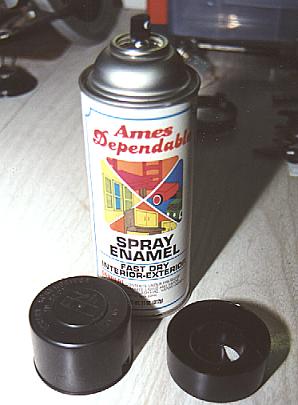
Then I grab a paint can. Too big. How's about the lid. Uhh... Whoa! The lid is a perfect fit. It snugly slides down into the bracket. So I start to trace it. Then I really start to think - creatively that is...I look at the inside of the lid, and realize something... It has a smaller center "lip" if you will, or raised piece, whatever it is. And, gee, looks like the speaker might fit in there. Let's try... Duuuuuuuuuude :-) The flush mount bracket for the speaker fits PERFECTLY in that little center section. Fine. To hell with cutting wood! I'll use this!
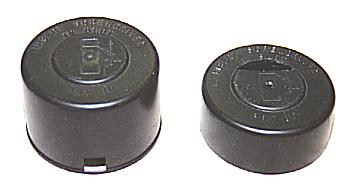
So I cut down the outer sides and cut a hole in the back for the speaker wire to run through (Pictures 4 - 6). Had to cut down the inside piece a little to keep the tweet grille from hitting the factory grille when it's in place.
Picture 7 shows all the pieces partly assembled, the tweeter mounted in the center section.
Picture 8 shows the whole paint can lid then nestled down in the factory bracket. The grille (you can see the edge clips that hold it in place) sitting beside it.
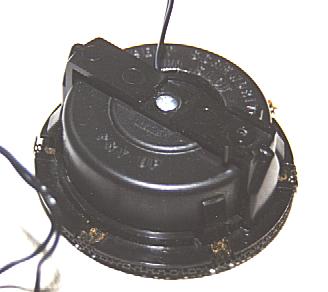
Picture 9 shows the underside of it. I originally used a screw to hold the lid in the bracket, but later removed it for an alternate method. I actually cut the side of the lid, cut little "flaps" in them. These flaps were actually necessary because when I went to drop the new pod into the dash of the car, it wouldn't go all the way in. Well, if you look at Picture 7, you can see on the bracket, there are 4 clips that hold it in the dash. With the lid dropped in there, they were forced out and couldn't move inward so the pod could drop into place. So I cut flaps in the sides of the lid around the bracket's clips, then they could move inward and the the pod popped into place in the dash. Well, that ALSO served as a sorta "lock" to keep the lid in place in the bracket, doesn't come out, doesn't spin. Cool! (You can see the flaps in Picture 11.)
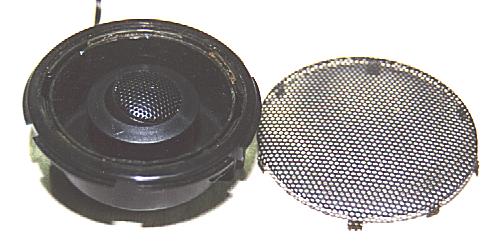
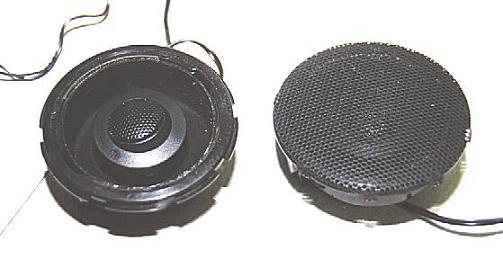
Picture 10 shows both new pods, one with the grille cover in place, one without.
Pictures 11 and 12 are the bomb! First shows the pod dropped into place without the cover and the second with the grille cover im place. I shot these through the windshield. In Picture 12, at a second's glance, you can't tell there's anything there but a factory speaker. Upon closer inspection, of course, you can actually see there's an aftermarket tweeter in there. When I finally installed them in the car for good, I clipped the factory grille cover on for the passenger side, but for showing purposes, didn't clip it on for the driver side, it's just resting in it's place. I can easily lift it off.
Picture 13 shows my ever-faithful trusty assistant - Sheba.
For signal, I tapped off the front stage lines (full-range, before the crossovers in the doors) and tucked the tweet's crossovers way up in corners up under the dash. Then had to snake the wires down thru the dash to the floors. Man! What a task! Had to about disassemble the front end of the interior for that!! Sheesh! Lots stuff behind/under that dashboard! But all told, they came out wonderfully!
I actually, angled the tweeters a little out and a little back, figuring on getting a nice splash off the windshield, coming to me high and wide.
Ok, so what's the net result? How's it sound? Whoa!! BIG difference! It really helped raise the stage to a better level and I really like the sound I'm getting now. Pair that with the center channel (now that the volume controller's in there) and I really like the sound. I've tweaked the balancing (the Balance Line Transmitter going to the front amp) 3 times already and been messing with the EQ (just did again today) and I think I finally got it really sounding good.
Worth it? Hell yeah!

