 8 8 |
 9 9 |
 10 10 |
 11 11 |
 12 12 |
 13 13 |
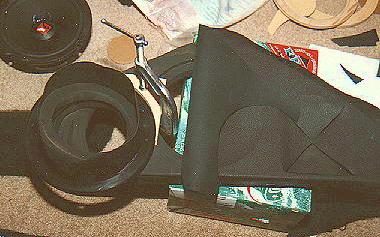
I had decided that I wanted to cover them with a mix of carpet and vinyl rather than all vinyl. I thought they would look better with the 2 materials to contrast each other, not to mention, the factory piece that was where the pods are was carpet/vinyl, and the lower portion of the car's interior (i.e., floor) is carpeted. I used more of the factory vinyl from the hatch cover, same as was used on the head unit trim piece. I was going to vinyl the front portions where the speakers were and around the neon.
I did the vinyl first (pictures 8-10), using a staple gun, Testor's modeling glue, and weights and clamps to keep things in place. I was very careful to keep the vinyl smooth with no glue bubbles underneath it. It wraps around the edge on the front portion and is stapled all the way around (which ended up underneath the carpet). The front section where the speakers are mounted is actually about 1/4" further out than the "tail" section where the neon is. I had to use an extra piece of plywood there to add thickness for mounting the speaker and keeping the cupholder flush. Worked out because I just vinyled that section and it slopes all the way to the bottom of the pods.
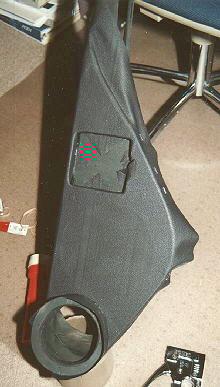
I also put vinyl around the opening for the neon light. That touch ended up working quite nicely and gives it a very finished look. I glued and stapled the vinyl right over the opening, then once the glue dried, slit the vinyl along the opening, and glued it into the opening so it wraps around the edges and into the inside. Worked perfectly.
Next was the carpeting. That actually wasn't too difficult. It's all stapled down, from the under side, all the way around. I stapled the edges of the carpet down from the backside then folded it back over itself all the way around the edge of the front portion. Around the neon, I did the same thing around the opening, leaving about 3/4" of the vinyl visible around the opening for the neon. Looks great! Carpeted the back side of the front hang-off section where the 4" is mounted.
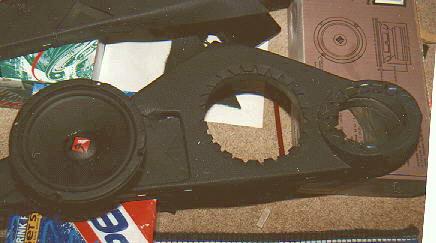
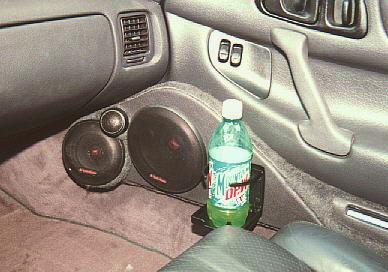
Once it was all covered, I screwed in the cup holders. I made sure I left a notch at the top of the opening so they could be opened. Perfect fit!
Next thing was attaching it to the door panel. Had to put the neon in first, that dropped perfectly into place in the notches I had hollowed out from the backside during the construction process. Couple screws hold each tube in place. I pre-drilled holes to attach the pods to the door panels. Used 1.25" wood screws and 1/2" washers on the inside of the panels to prevent them from being ripped through the door panels should they be given a good tug. Tightened everything down and those baby's are FIRMLY attached to the doors.
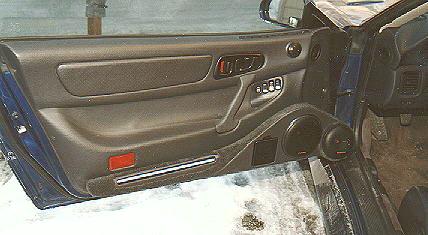
Next was putting things back into the car. Soldered wires for the neon to the leads in the car. Ran the speaker wires through and soldered the 4" and 6" in, then screwed them in. Then reattached the panels to the car door. Hopped out and gave closing the door a try AAAAAAND..... Damn. I did the passenger door first because I knew it would probably be the problem... Well, I hit that problem. The hang-off part of the pod where the 4" speaker is was pressing way too firmly against the interior of the car and underside of the dash Hmmmm.... Well, I unsoldered everything, took the panel back off, and took it back upstairs. Pulled the pod off and moved it about 1/2" back, couldn't go any farther otherwise the magnet on the 6" would hit the metal frame of the door. Reattached the pods, and headed back out into the snow to try again. (I had gotten the car back from Radio Shack earlier that week when I knew I'd be needing it more than occasionally to test the fit of the pods.) Well, second try netted a perfect fit! The door closed just fine! YEAH!!! So I did the driver side and it went on perfectly the first time. Psyche! I was pumped because 2 days later I was headed for Florida for a week vacation with my brother during his spring break. (Had a blast, by the way...).
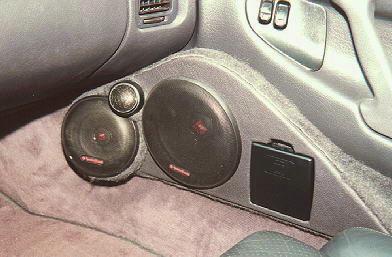
Now, the original designs for the new door pods included moving the tweeters down beside the other speakers rather than higher on the door. Well, I finally got around to tackling this project late summer of 97. I took an extra pair of Power tweets and simply taped them in down by the 4" and 6", with the intention of competing with them like that. Yea, taped in. I wanted to see what the sound judges thought. Well, I showed up Sunday, like every other IASCA show in the country, only to find out the show was on Saturday. %#@$#^@!! Well, I went ahead and mounted them in there because *I* liked the sound better, and I thought it looked better with them down there. I cut and sanded a little angled wedge of MDF and covered it, drilling a 1/4" hole through it and the pod to run the wire, then mounted it right to the pod. This finally gave me full kick panels in the doors!I was psyched to have them done and love them. They are 3/4" thinner than the first pods on the front part where the speakers are, and 1.25" thinner on the "tail" section where the neon is. Not to mention the CUPHOLDERS are the ultimate! My fellow Stealth and 3000GT owners know what I'm talking about... <-wink-> In other words, the rebuild of the door pods fully lived up to my expectations of myself (pat self on back ;-) .

